


What is Rebar Detailing?
According to Wikipedia, Rebar detailing is the discipline of preparing shop drawings or fabrication drawings or shop/placing of steel reinforcement for construction.
Architects and Engineers prepare “design drawings” that develop required strengths by applying rebar spacing, location, size and lap of steel.
Why use Rebar Detailing In Revit?
Revit is the most popular software using BIM technology in construction design. It delivers high efficiency and produces models with high accuracy rates. Therefore, Revit is very popular and appreciated by many users among many BIM software on the market.
Rebar Detailing In Revit – Effective Tips You May Not Know
Here are 10 tips from author Ovidiu Paunescu that we have collected:
1. Include Hooks or End Treatments in the Rebar Shape Definition
Let’s start with 2 project-level settings that determine how rebar behaves when adding hooks or end treatments. These can be modified only when there is no rebar placed in the project. You probably have this already set up in the template you are using, so you may not need to bother with it.
How to change these options:
Structure tab -> Reinforcement -> Reinforcement settings -> General

Check include hooks in Rebar Shape definition (make sure there’re no rebar placed in the project)
Here’s a example to check how this option works:
- Place a straight bar (Shape 00)
- Add hook at start -> notice that a new shape has been created (Rebar Shape 1)
- Add hook at the end for the same bar -> the shape matches to 01 or M_01
** In cases where rebar is not detailed (annotated in various views), you can select all the bars, maybe with hosts & cut (Ctrl+X), change this setting & paste (Ctrl+V) back into the project.
2. Valid Host for Rebar
In order for an element to be a valid rebar host, it needs to belong to a Structural category & have the Material for Model Behavior in the family set to Concrete, Precast concrete, or Other.
Category:
- Structural Framing
- Structural Columns
- Structural Foundations
- Structural Connections
- Floors
- Walls
- Foundation Slab
- Wall Foundation
- Slab Edge
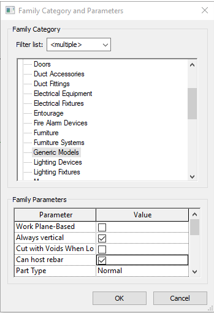
Generic model elements, family based or model in place, regular or adaptive, can also host reinforcement if the Can Host Rebar parameter in the properties palette is checked.
How to do this:
- Edit the generic model family
- Without selecting anything, inside Edit Family, go to the properties palette & check the Can Host Rebar parameter
- This parameter is also available in the Family Category & Parameters menu
To check inside the project if an element is a valid host, you can do the following:

- Select the element -> check that the contextual ribbon shows a rebar icon
- Launch rebar placement & check that the cover is shown when hovering over the element
- Select rebar -> Pick New Host & try to select the element in question; if it can be selected, then it’s a valid host
3. Find the Rebar Host
When you select rebar, its host will show the concrete cover. This is easy enough when the rebar is placed inside the host & both are visible. However, rebar may end up far away from its host.
To find the rebar host, starting with Revit 2021.1:
(https://drive.google.com/file/d/1rzZzkmh7z1ViZVZsh6JOiWFO52dBbiO6/view?usp=sharing)
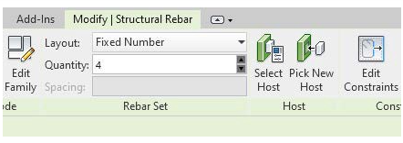
- Select the rebar
- Use the Select Host command in the ribbon
- OR right-click & use the Select Host command in the right-click menu
The right-click option is available for area & path reinforcement as well, and you can select either the boundary or the bars inside the system.
4. Control the Concrete Cover by Element Face
The concrete cover in Revit is a property of the structural host. Rebar snaps to the concrete cover, ensuring that bars will be protected from corrosion when fitted on-site.
You can quickly set the cover for various element faces (top, bottom, other faces), depending on the element type, from the cover parameters in the properties palette.
To set the cover for the entire element or just a specific face, use the Cover tool:
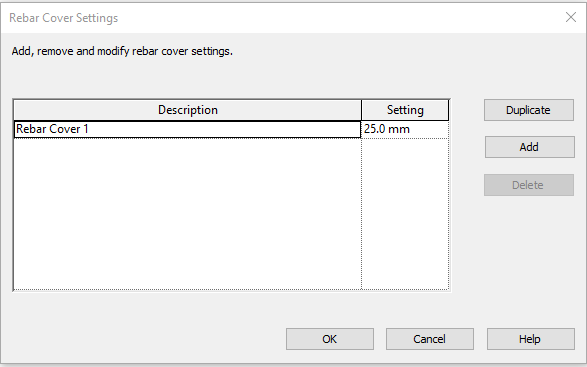
- Click Structure tab -> Reinforcement panel -> Cover
- In the options bar, select the Pick Faces command
- Click one or more element faces (Ctrl to add to the selection) for which you want to adjust the cover
- Select the cover setting from the drop-down in the Options Bar
- Optional: you can create or edit the cover settings by clicking the button on the Options Bar
5. Edit the Appearance of Concrete Cover Lines
You can edit the appearance of the cover lines for the entire project.
To do this, go to Manage -> Object Styles -> Annotation Objects tab,
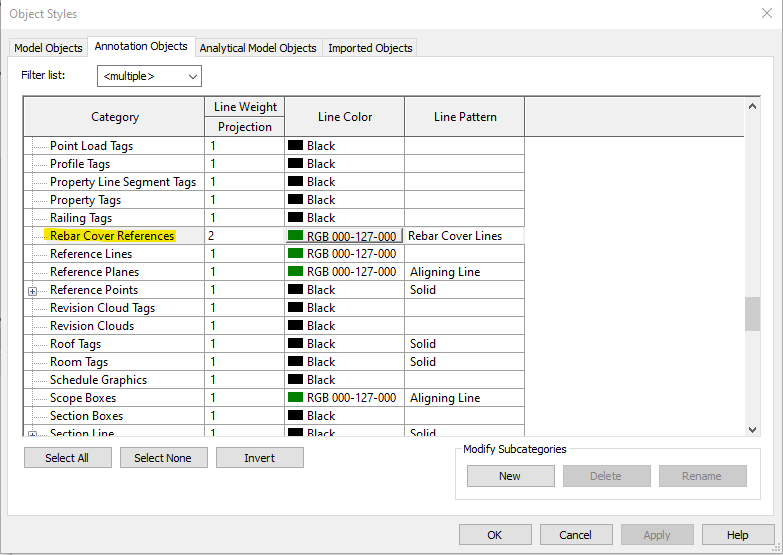
find the Rebar Cover References category & edit the line weight, color, and pattern.
6. Presenting 3D Rebar
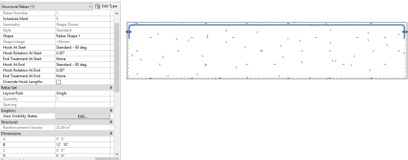
You can get a realistic representation of rebar in 3D views by setting the bars to be displayed as solid. There is a specific setting for rebar called view visibility states.
To also distinguish between bars, I recommend you use filters based on relevant criteria. In this example, I used the rebar type as a criteria. To maintain consistency of all the 3D rebar views, I also recommend you save the view with filters as a template that you can then apply to other views.
You still need to set the solid view of rebar for all the views where you want the bars to be shown as solid. To avoid showing the bars over the host, I recommend you uncheck show unobscured & make the host transparent.
Here are some steps you can follow to achieve this:
- Crop the element you want to display by a section box (select element(s) and press BX)
- Select the rebar you want to show as solid -> Go to the Properties Palette -> Scroll to View Visibility States & click Edit -> Uncheck View unobscured & check View as Solid for the view where you want to present it; you can check/uncheck for multiple views at the same time

- Go to Visibility/Graphics Overrides (VG) -> Filters tab -> Add a filter based on the criteria you want for adding color (e.g., Type Name equal to 13M)
- Repeat the previous step to add all filters, then customize the appearance corresponding to each rebar type

- Select the solid fill & color for each filter
- Select the concrete host & neighbors (as needed) -> right click & Override Graphics in View -> by element -> 60% transparency
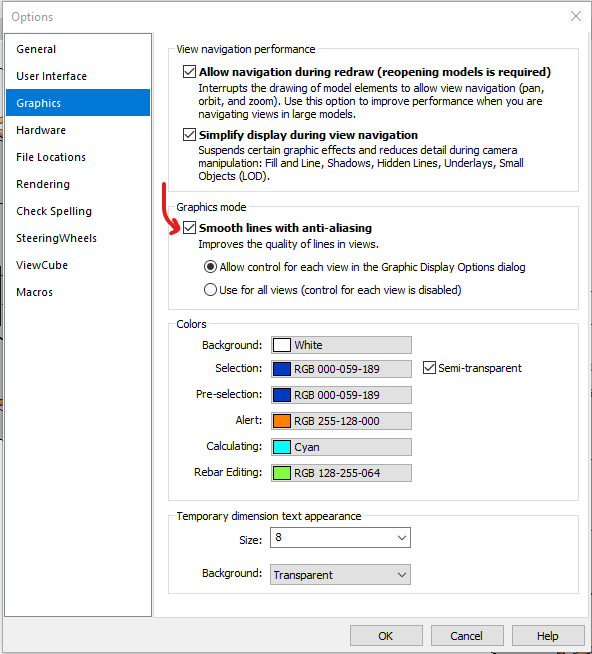
- Open the Graphics Display Options for the view & check the Smooth lines with the anti-aliasing option to get rid of the jagged edges
Optional: save a view template from the view you just edited & apply or assign it to other views where you are presenting the rebar
In the Graphics Display Options, there is also the option to Show Edges. When unchecked no element in the view shows edges. This may be a good option for rebar, but may not show the concrete elements as expected.
Below is an example of applying the color to just the fill versus applying it to the fill & the projection lines.

Example of the same view with only the fill color & fill color plus projection line color at a view scale of 1:25 without thin lines enabled.
7. Setting the Color for Rebar Cut by Views
When cut by a view (section, plan, elevation) rebar shows a filled circle representing the bar diameter. Unlike other elements in Revit, this does not have a fill pattern representation, so adding a fill pattern and color will not do anything.

To add color to the circle representing the bars, you need to set a color property for the cut lines. You can use whatever method applies to what you are trying to achieve, overriding by element or category or using filters to add color based on rules.
8. Count the Number of Bars per Host
You can use the Host Mark & Host Count parameters of rebar to schedule the number of bars per each identical element.
How to do this:
- Add identical Mark values to identical elements in your project
- Create a rebar schedule
- Add Host Mark, Host Count, and other relevant parameters
- Create a calculated value called Quantity by Host=Quantity/HostCount
9. Show the Shape Image in Schedules
Just like the other types of families in Revit, you can use the Image type parameter of rebar shapes to add a shape image for displaying in the schedule.
To do this:
- Edit the rebar shape family
- Go to Rebar Shape Parameters
- Edit the Image parameter & load the adequate shape image
- The image should be generic, as it will be displayed for all bars using that shape
- Reload into the project
- Create a rebar schedule that references the Image type parameter

Displaying images for each rebar instance is something that could be automated through the API or using Dynamo, to assign an image to the instance parameter Image of each bar. This means that for each bar, a shape with actual dimensions could be displayed in the schedule. Manually this doesn’t really make sense, as it is prone to errors.
10. Select / Delete Bars by Rebar Number Using Filters
You can use schedules as easy to delete bars with a series of rebar numbers or other properties. To do this:
- Open a schedule & a model view side by side
- Filter by the rebar numbers you want to remove
- Select the rows in the schedule & switch to the model view
- Delete the selected bars
This method of selecting bars applies to uniform rebar sets. Bars in varying rebar sets cannot be currently selected this way.
Thank you Mr. Ovidiu Paunescu for these helpful tips.
If you are in need of Rebar Detailing Services for your projects, check out our services at: https://oceanbimcloud.com/shop-drawing-services